
Working with LEDs - Part Two: Basic Soldering Tips
Welcome to part two of my guide for working with LEDs and toy soldiers. In this blog post I'm going to demonstrate some basic soldering tips.
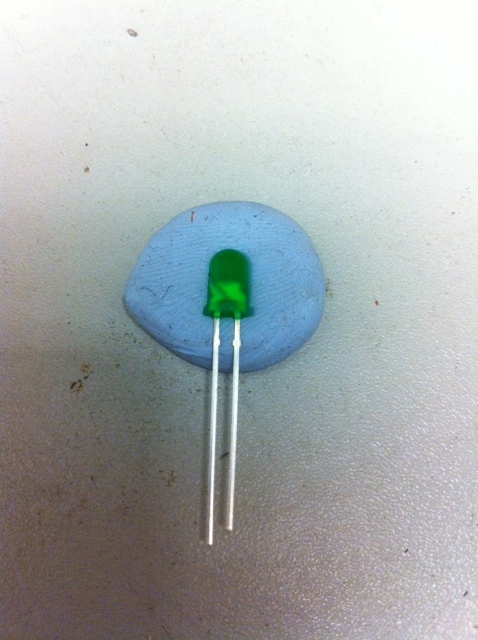
1. Secure the LED
First you'll need something to hold the LED (or the model component that it's mounted in) steady. Purpose built clamps and armatures are available, but I find you can't beat a big lump of blu tack.
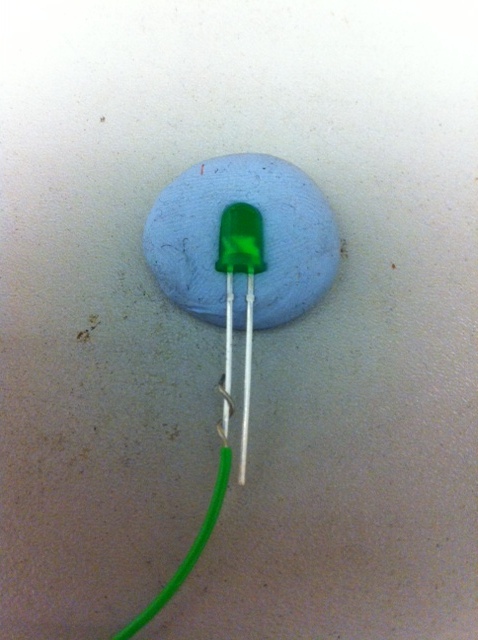
2. Prepare the Wire
Strip some of the insulation from the wire and then twist it around the leg of the LED. You may need to use tweezer or needle-nosed pliers to help you with this. It's much easier to solder together two wires that are intertwined rather than simply resting on each other or touching. Depending on how the electronics are laid out in your model you may wish to bend the legs to different angles at this point. Note that there are little 'tags' or 'bulges' at the top of each leg. Keep the legs straight above these points otherwise you risk damage to the LED.
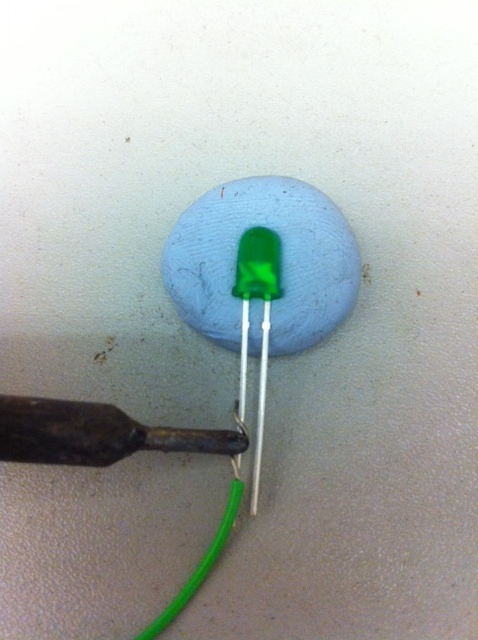
3. Heat the Solder Joint
Apply your hot soldering iron to the joint for approximately ten to fifteen seconds. Your solder will flow much better if both components are pre-heated. Again, do not solder above the tags as you may damage the LED. Additionally, must manufacturers will specify a heat tolerance for the LED during soldering (often on their websites). Do not set your soldering iron above this temperature. If no temperature is specified then set your soldering iron to around 300°C just to be safe. Having said that, heat damage to LEDs can only come from prolonged exposure, so as long as you're fairly quick when soldering you shouldn't have a problem.
4. Apply Solder
Apply your solder to the flat part of the soldering iron tip. If the two wire and the LED legs are sufficiently heated then the solder should flow smoothly along the join.

5. Trim Then Repeat
Any excess wire and leg can now be trimmed off and the process repeated for the other leg.

Filter by tag
Filter by author
Filter by month
External joint blogs
The PCRC also maintains several joint blogs via Warseer:
External blogs
Who's online
There are currently 0 users online.